Infrastructure as Code (IaC) to deploy Managed EKS Cluster and Node Group on AWS
Cloudformation as an IaC tool
Hey fellow developers 👋, we know that Kubernetes is being adopted by many organisations worldwide in an attempt to simplify orchestration and management of container based applications.
AWS has its own version of Kubernetes called EKS where we have the ability to ask for a managed EKS Cluster and AWS will take care of all the underlying patch management, software updates etc of the underlying hardware and software in use.
This blog post aims to empower you with an idea on using IaC (Infrastructure as Code) tool (cloudformation in this case) to deploy EKS infrastructure on AWS.
Prerequisites
- Knowledge of Yaml files.
- Basic understanding of IaC and AWS Cloudformation
- AWS CLI installed in your system.
- Kubectl installed in your system.
- Docker installed in your system.
- Make installed in your system.
Source Code
You can find the source code for deploying EKS infrastructure resources here.
The file defaults.conf under settings directory specifies configuration for the EKS cluster and node groups. All resources deployed using the source code is namespaced with an application name, feel free to change the configuration as per your needs before deploying the resources to your AWS Account.
Considerations before deployment of EKS Cluster
- An S3 bucket to store cloudformation artifacts. When you run
aws cloudformation deploy...., we need to specify an S3 bucket to store the template in. - A VPC with public and private subnets and at least one security group which allows all outbound access only (Kubernetes Cluster will leverage this security group to talk to the Internet and Managed Node Groups - same security group will be attached to the Worker Nodes allowing communication to the cluster and internet). Find more information on security group considerations here .
- You can choose to create a managed EKS cluster to be Public/Private or both. In this tutorial, we will create the cluster to leverage both public and private subnets so Amazon EKS recommends running a cluster in a VPC with public and private subnets so that Kubernetes can create public load balancers in the public subnets that load balance traffic to pods running on nodes that are in private subnets and we can also access Kubernetes API publicly. Find more information on VPC considerations for EKS here .
Deploy a VPC
Login to your AWS Account from your command line and clone eks-infra repository
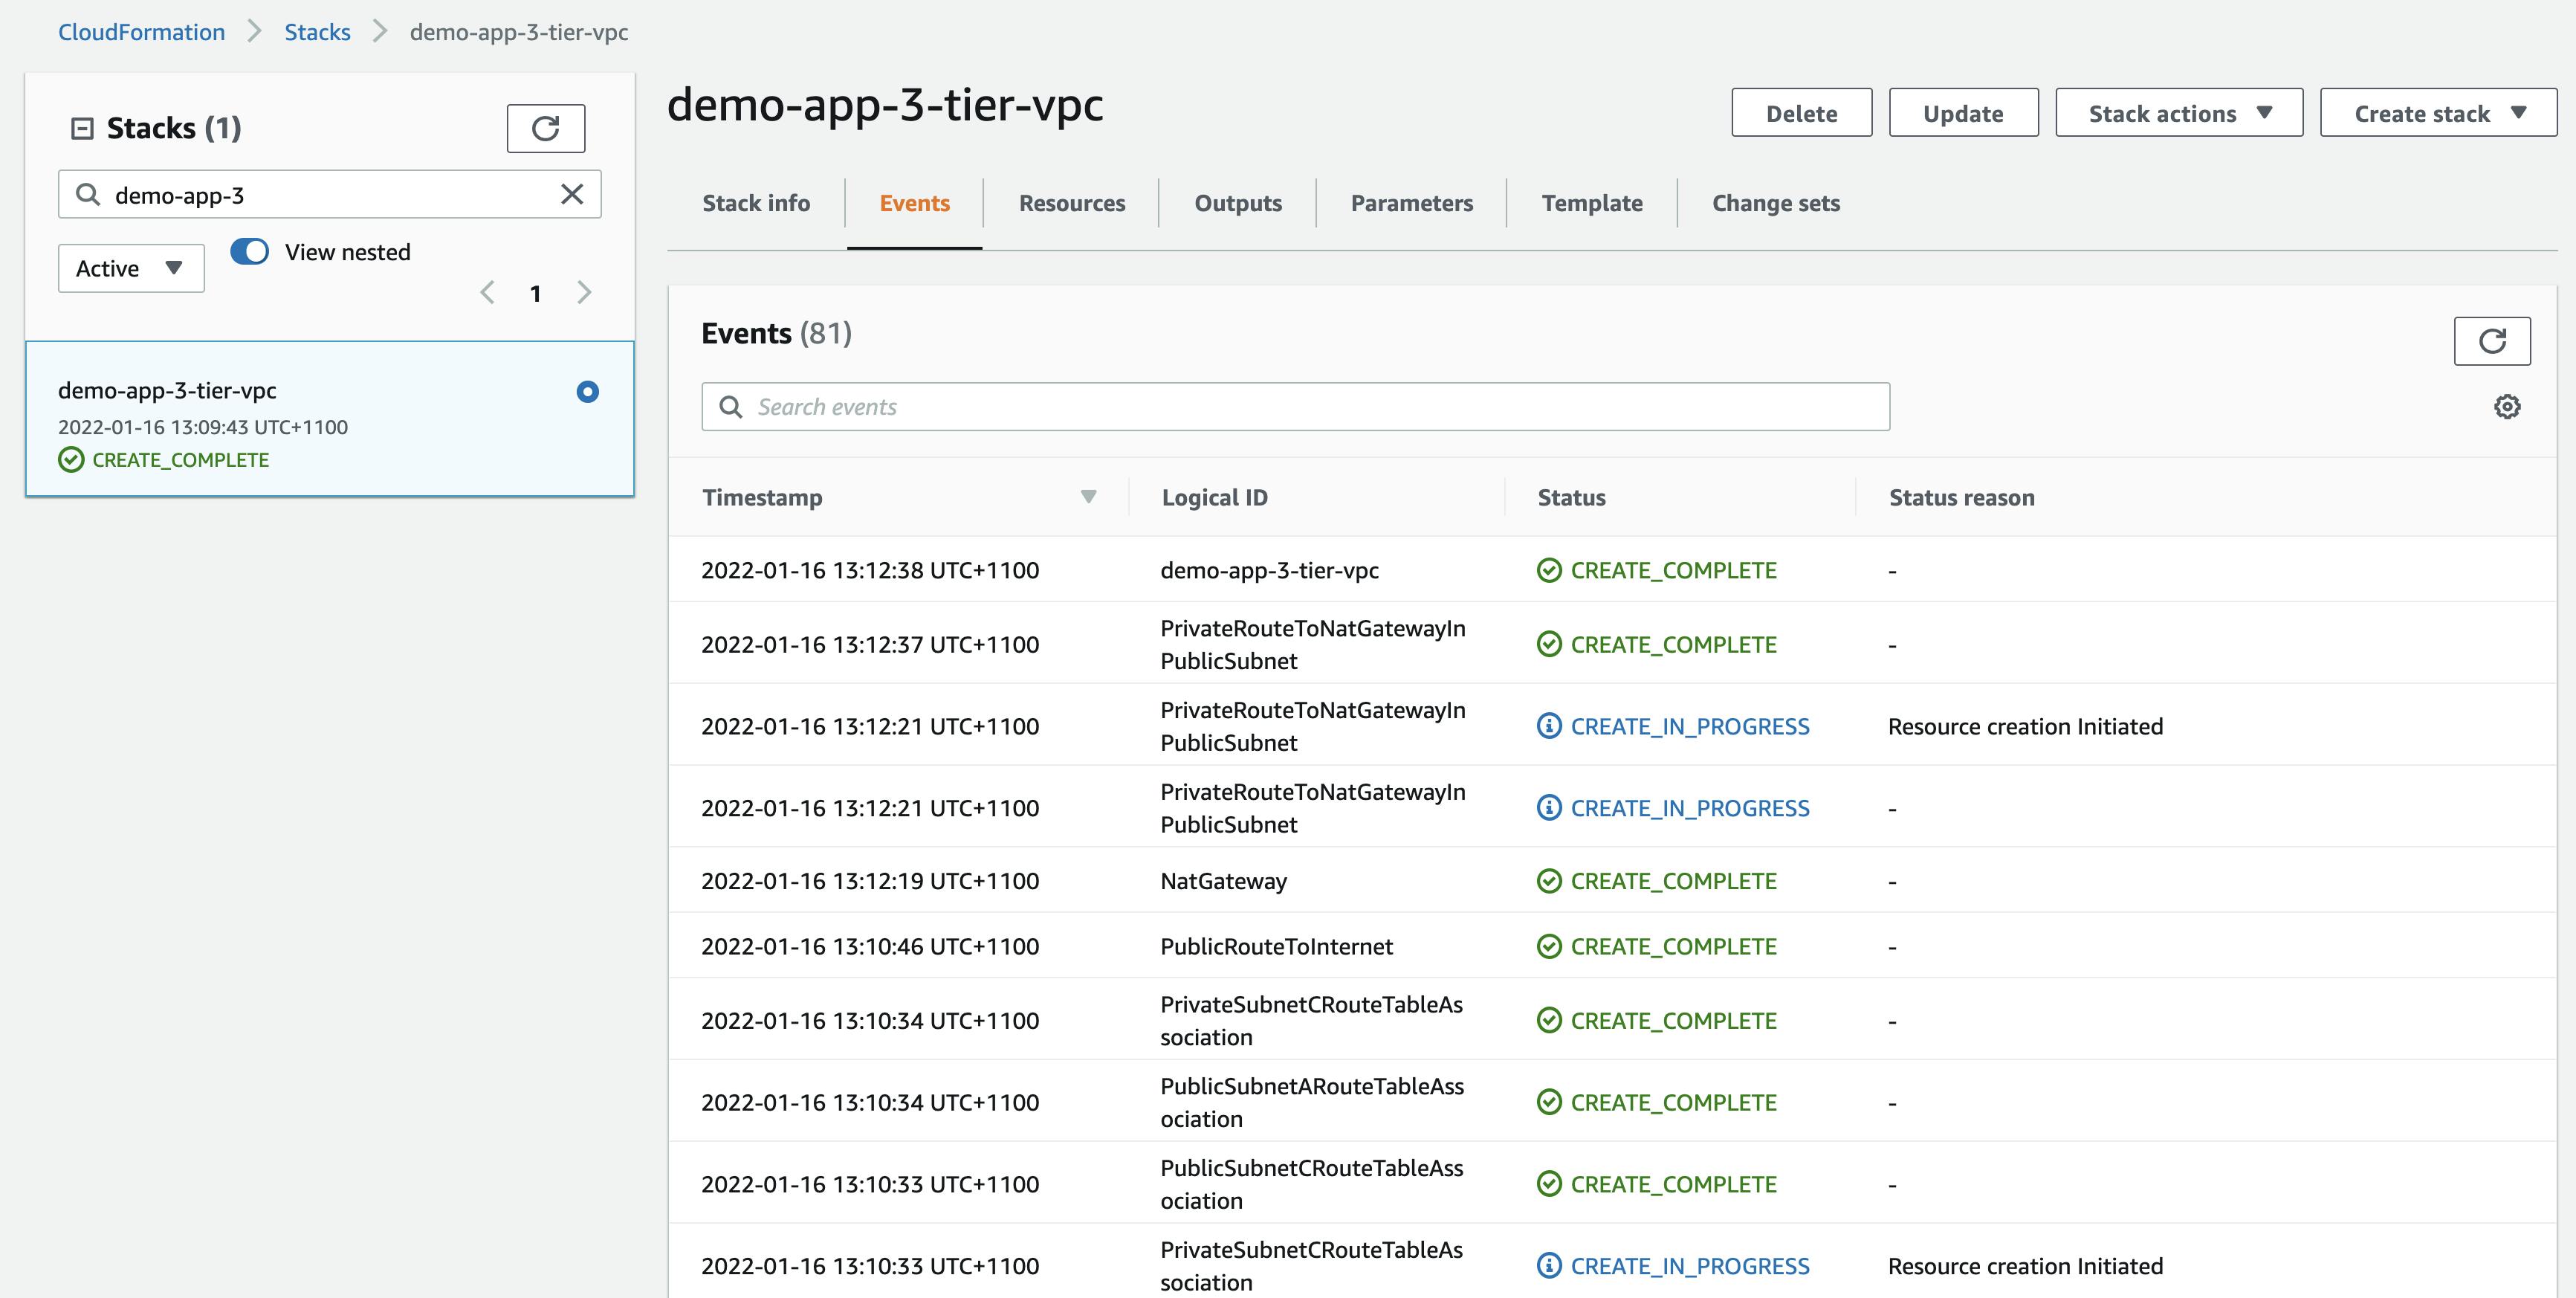
As mentioned in the considerations section, we need to deploy a network for the EKS resources to consume. We will deploy a VPC with 3 public and 3 private subnets to cover 3 Availability Zones.
Run make deploy-3-tier-vpc to deploy a VPC. Network ranges for the VPC and subnets are defined in the defaults.conf file. The default values are:
- VPC Network CIDR:
10.0.0.0/16 - Public Subnet 1 CIDR:
10.0.0.0/19 - Public Subnet 2 CIDR:
10.0.32.0/19 - Public Subnet 3 CIDR:
10.0.64.0/19 - Private Subnet 1 CIDR:
10.0.96.0/19 - Private Subnet 2 CIDR:
10.0.128.0/19 - Private Subnet 3 CIDR:
10.0.160.0/19
We can login to the AWS Console to see that the Cloudformation stack has been created,
Deploy EKS Cluster
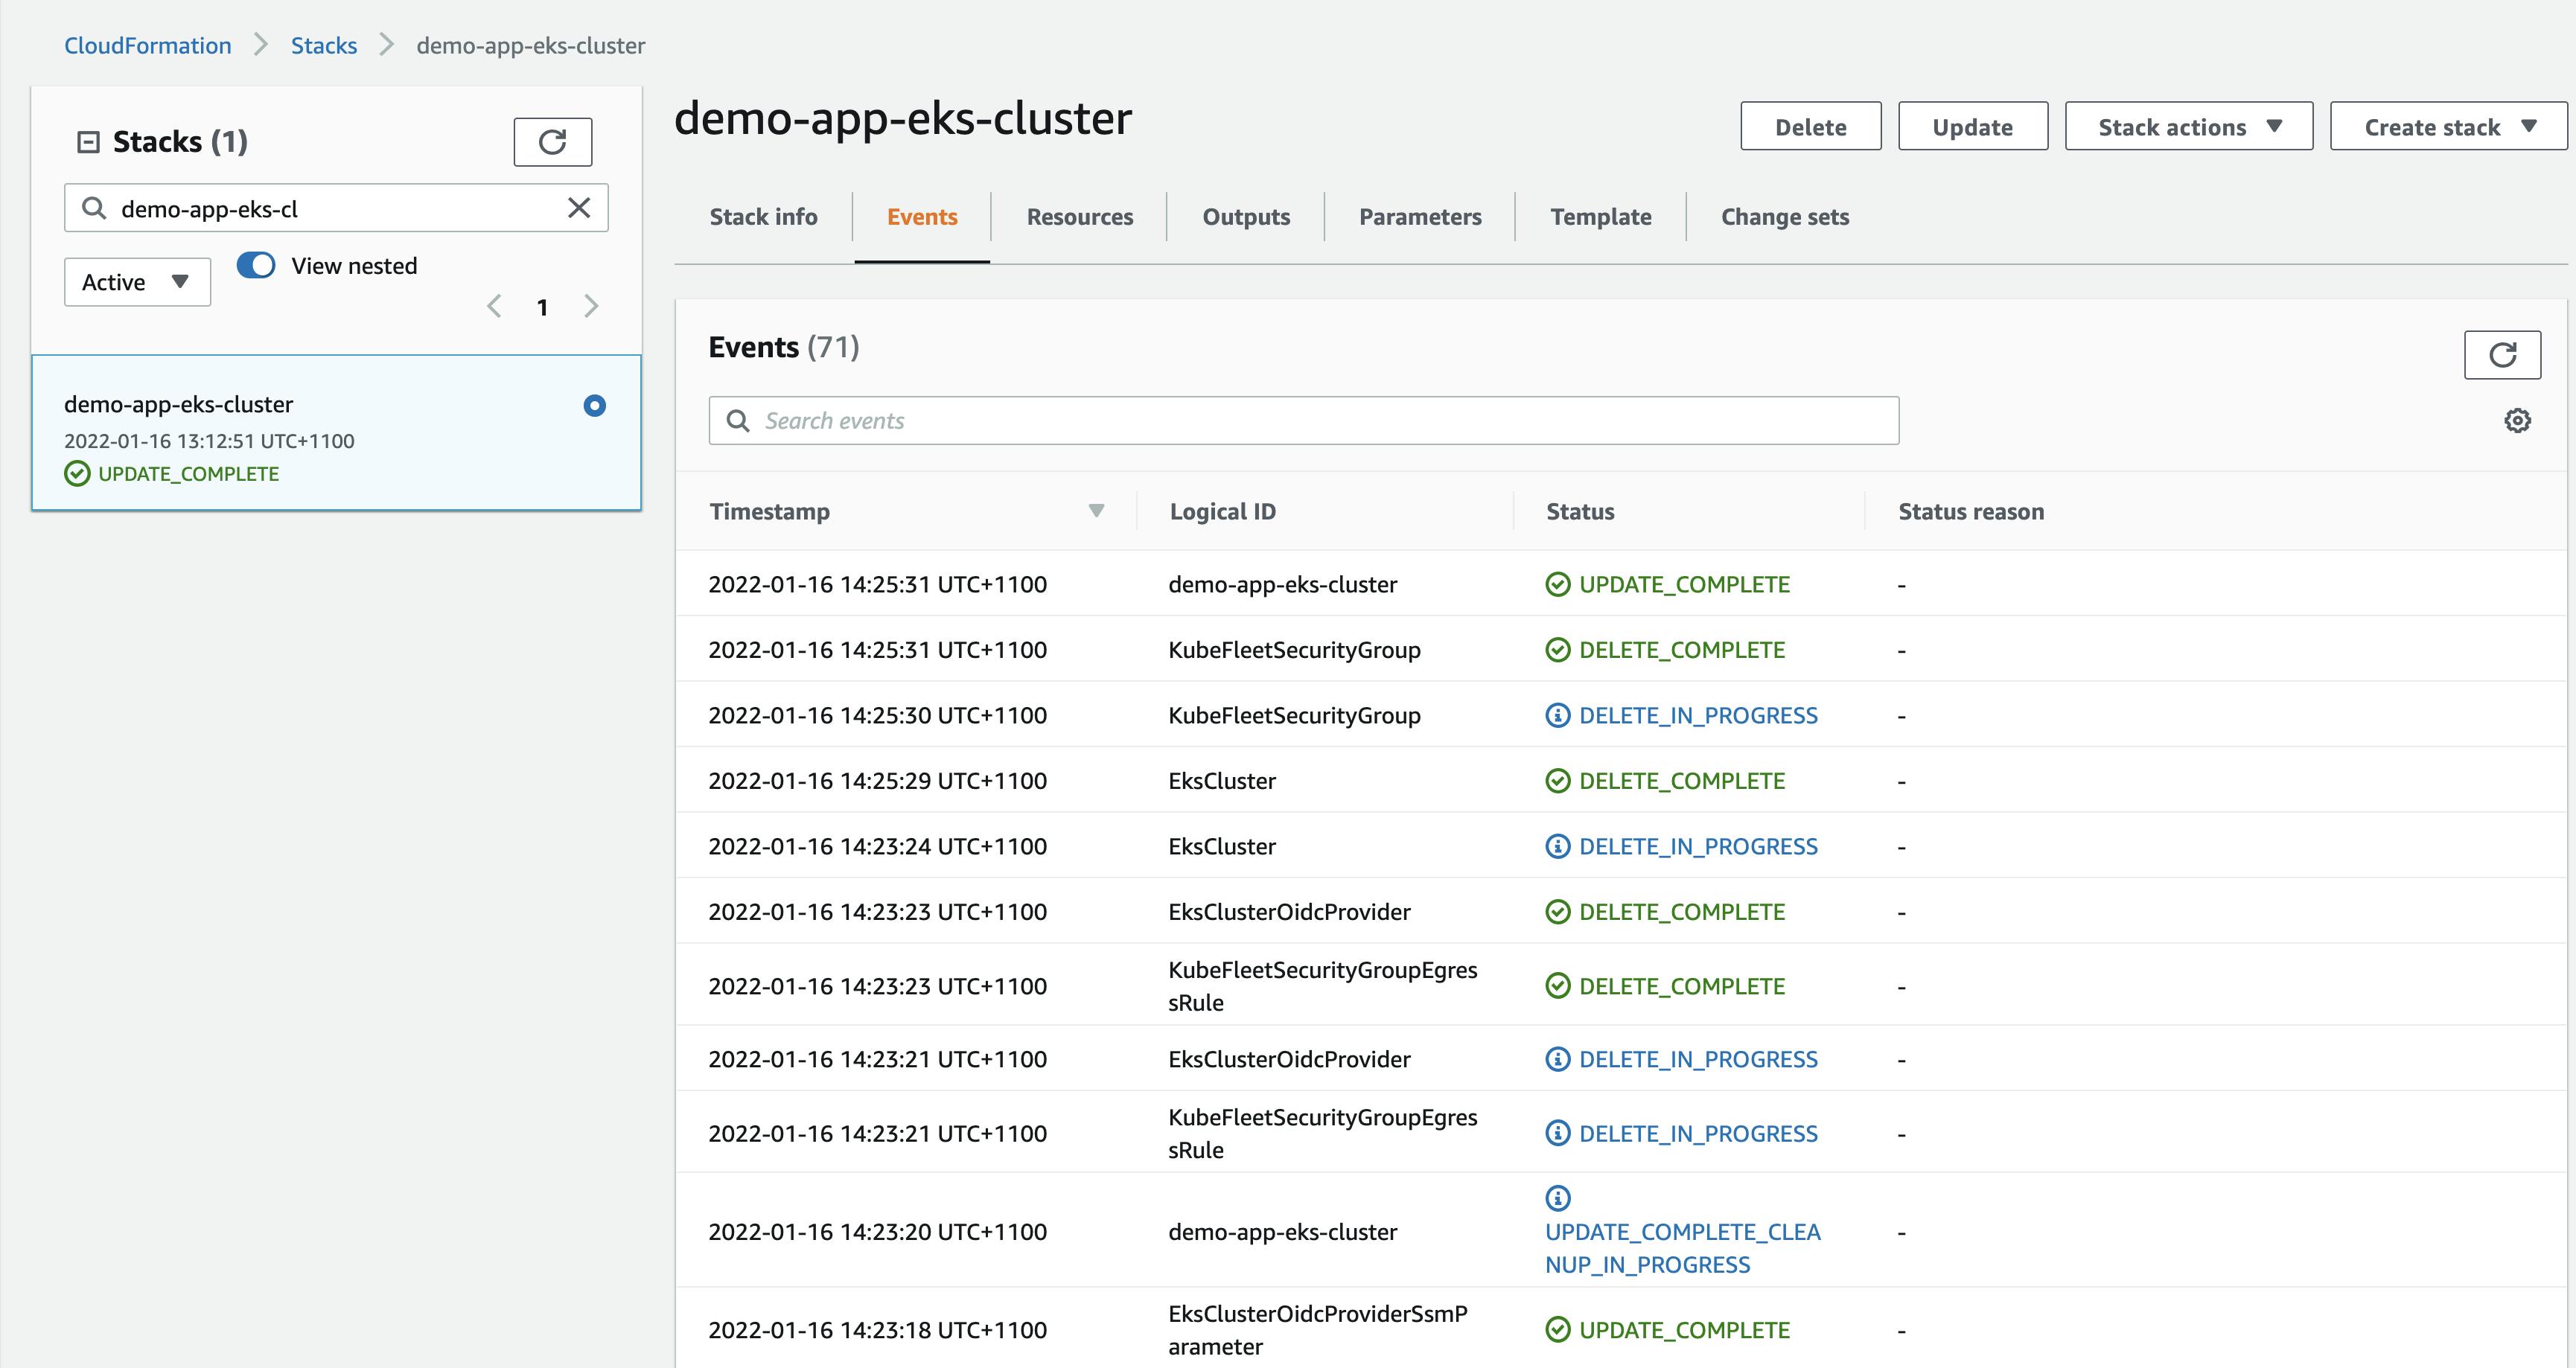
Run make deploy-eks-cluster to deploy an EKS Cluster. The resources deployed by the template cloudformation/eks-cluster.yaml are,
- Security Group for the cluster
- An egress rule to allow all traffic
- Eks Cluster
- IAM Role
- Cluster name stored in SSM parameter store
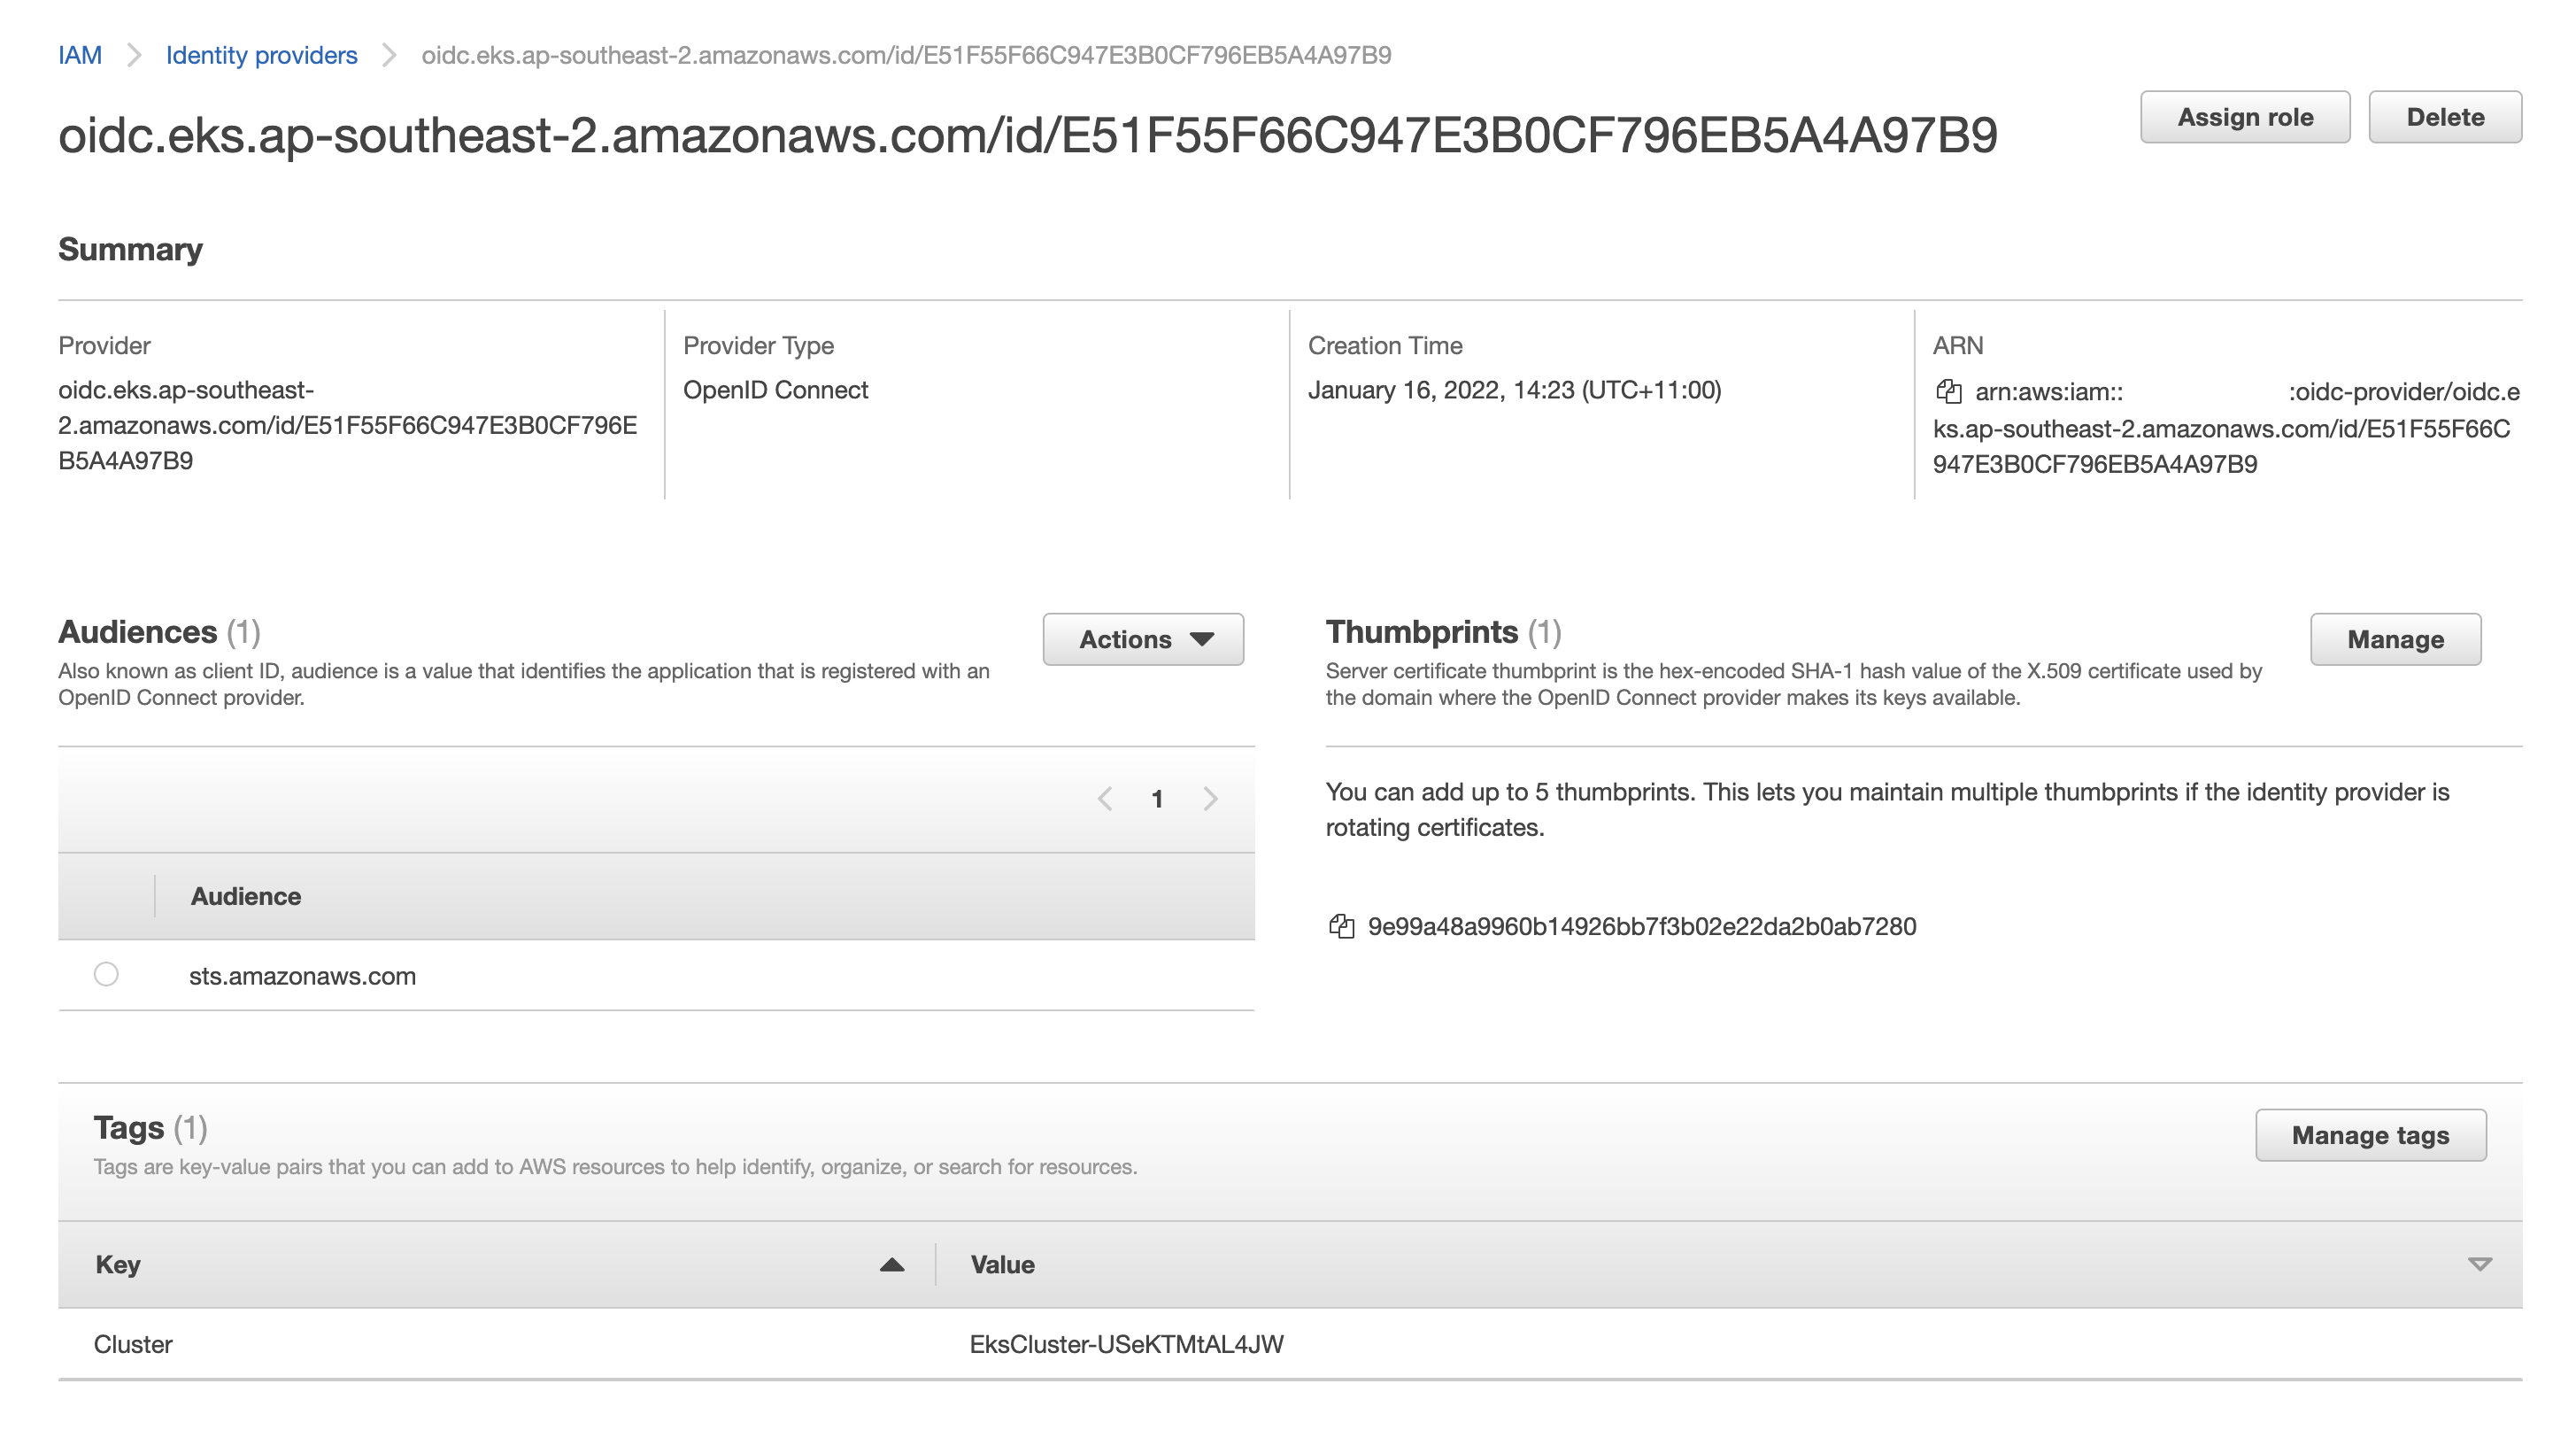
- Cluster OIDC provider
- OIDC Issuer URL stored in SSM parameter store
- Application Namespace stored in SSM parameter store
The cluster is created with the following configuration,
- Kubernetes version is set to
1.21. - Cluster is configured to utilize both public and private subnets.
- Both public and private access enabled to the Kubernetes API Server.
- Logging is enabled for the api, audit, controllerManager, authenticator, and scheduler.
- Public access to the Kubernetes API Server is restricted to your home network.
We can login to the AWS Console to see that the Cloudformation stack has been created,
Navigate to IAM console and verify that the Open OIDC Provider for the cluster has been created,
Finally, we can navigate to EKS console to look at the cluster itself,
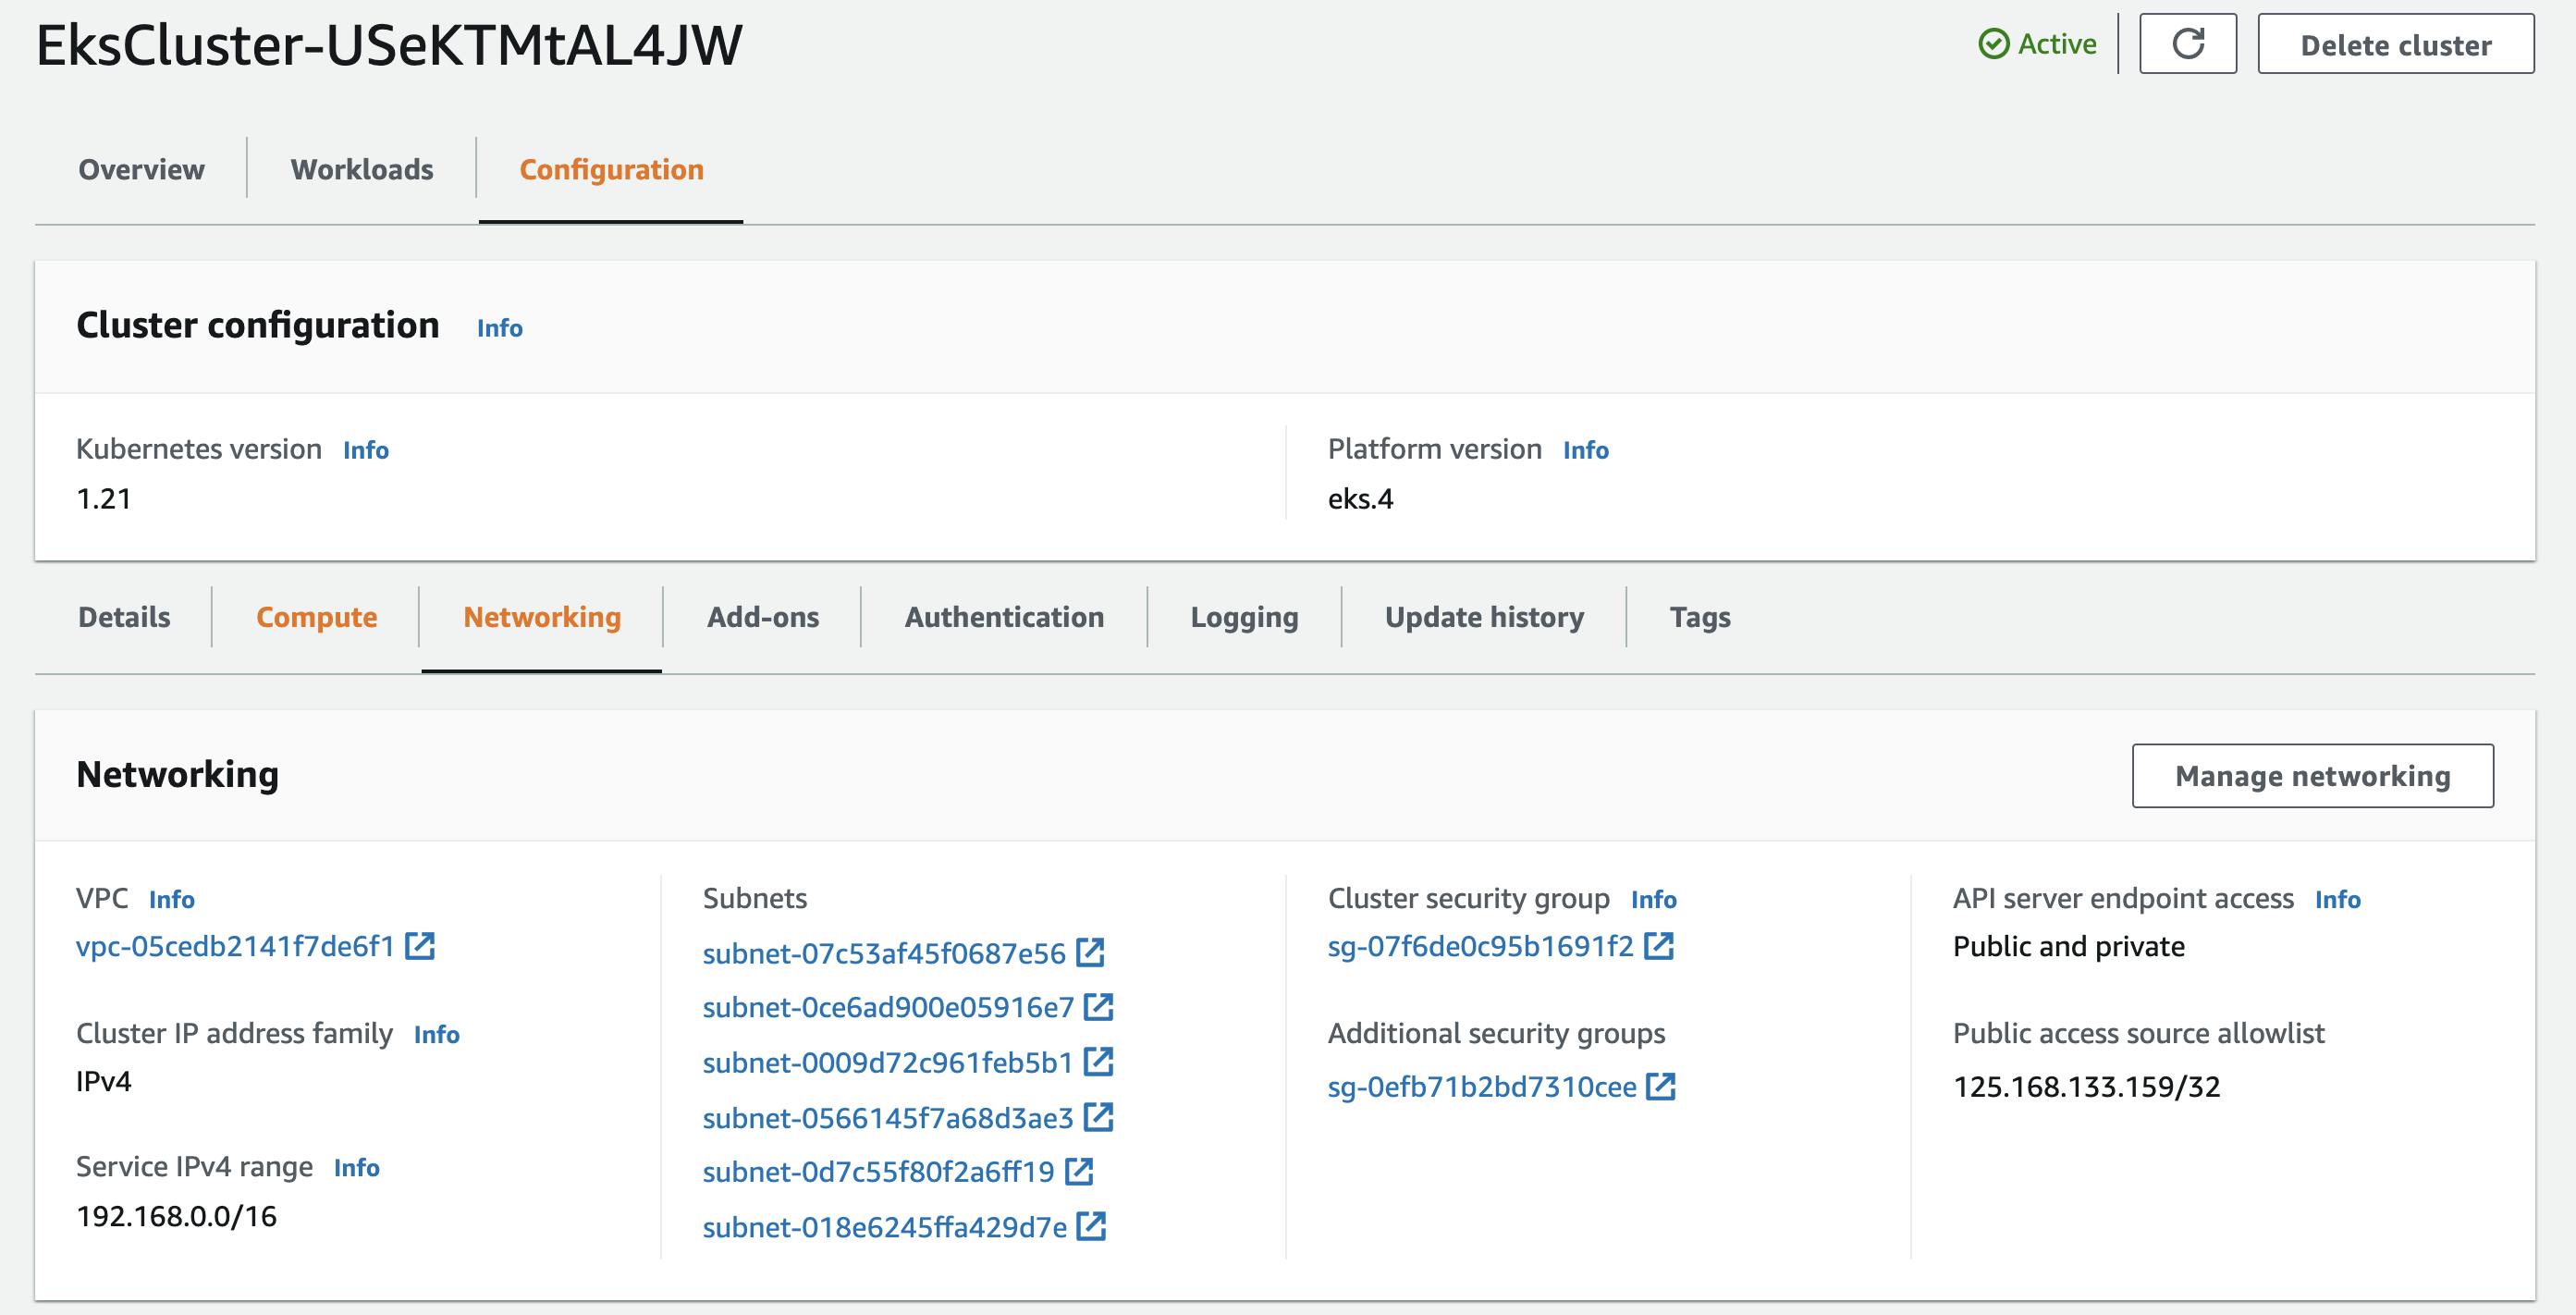
Note that access to the API Server is restricted to my home network 125.168.133.159/32. This is to protect the API server from being accessed by malicious actors on the Internet. It is always considered best practice to restrict access to your AWS environment from the required neworks.
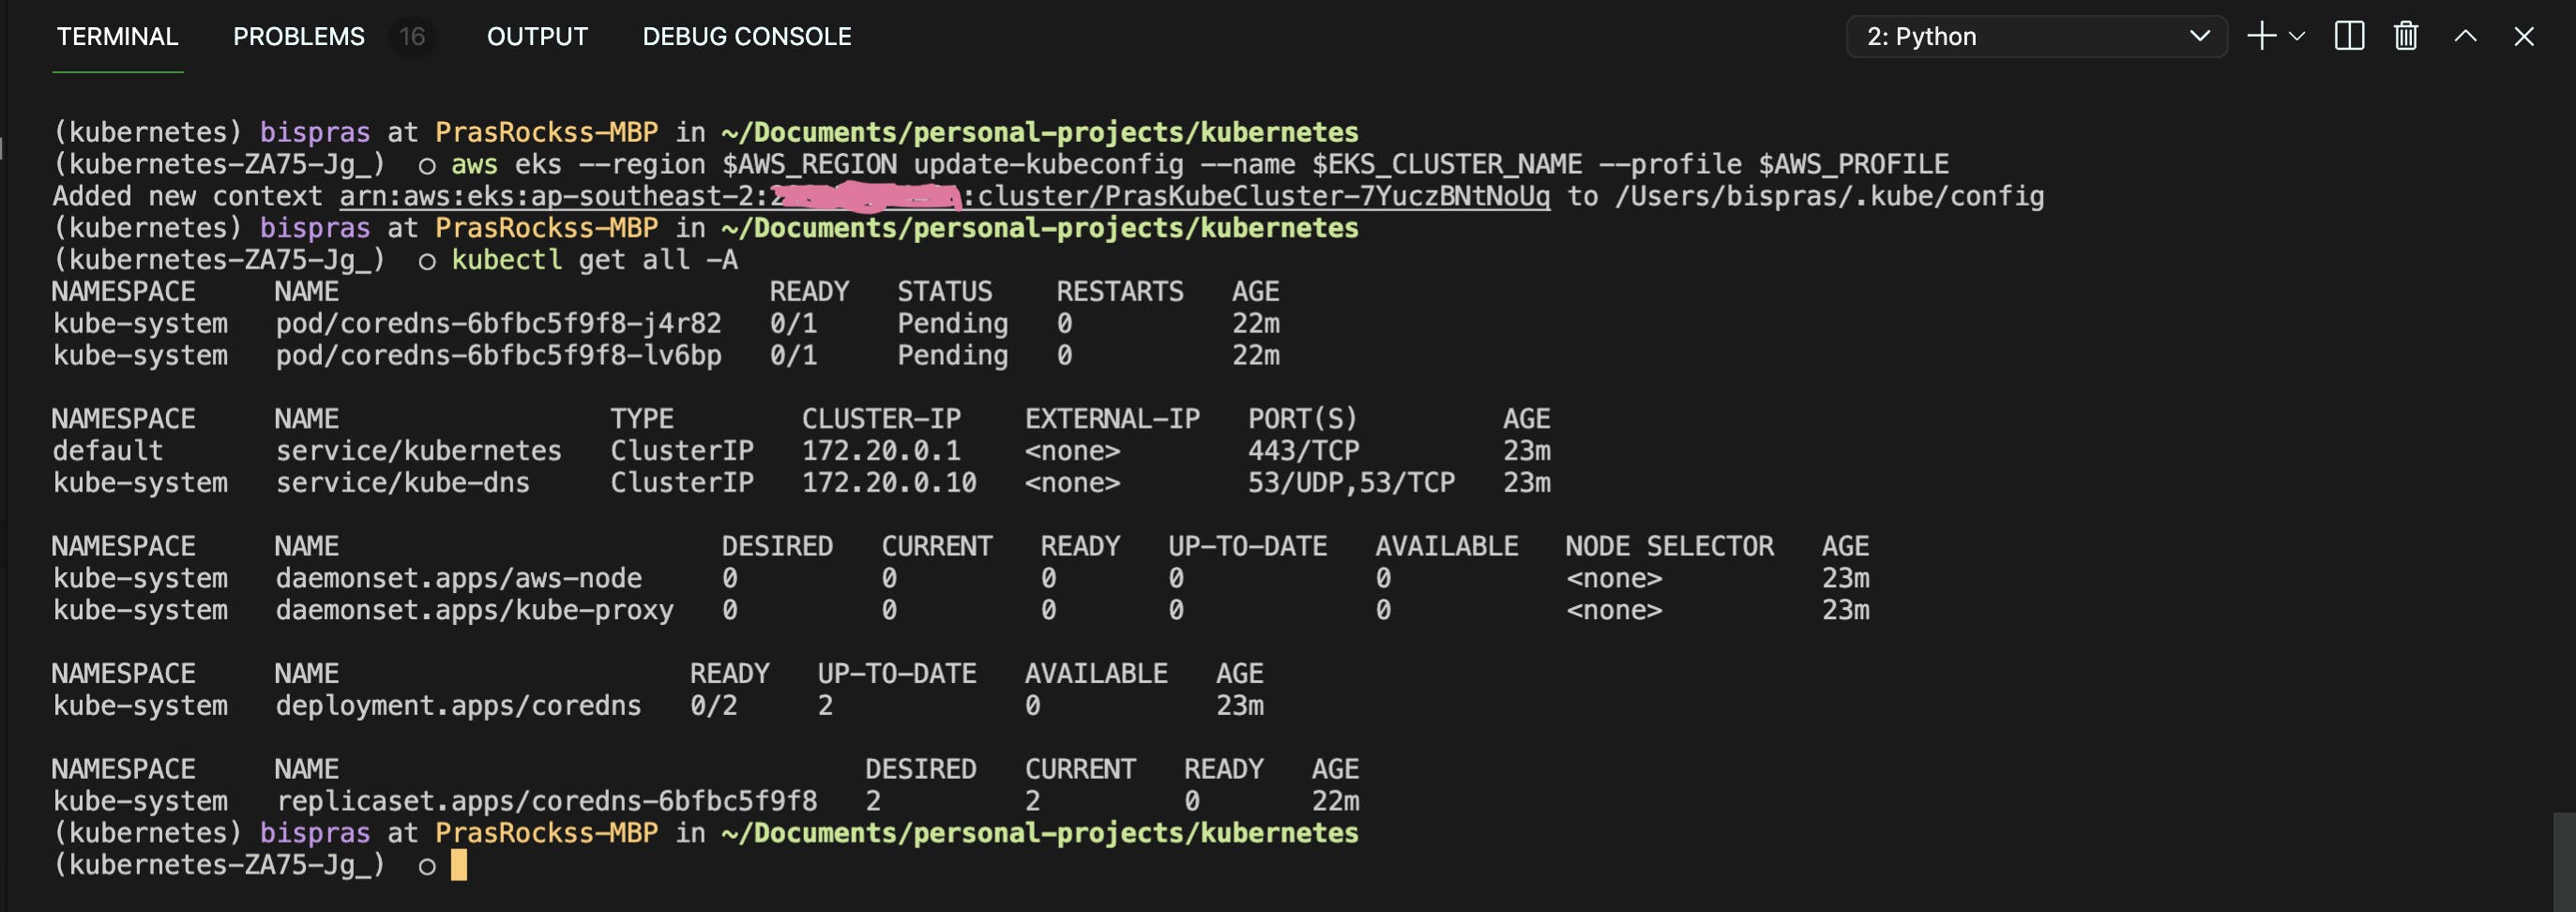
Now that we have a secure network link to the EKS API Server, lets configure kube config locally in our system to interact with the API Server. Run make update-kubeconfig to update kubeconfig.
Then run any kubectl command to verify that you are able to connect to the API Server.
Deploy EKS Addons
Run make deploy-eks-addons to deploy EKS Addons. The following addons are deployed:
VPC CNI
We need to configure pod networking so that each pod gets an IP Address to be able to route other pods and the internet.
Amazon EKS supports native VPC networking with the Amazon VPC Container Network Interface (CNI) plugin for Kubernetes. This plugin assigns a private IPv4 or IPv6 address from your VPC to each. Each network interface in an EC2 instance can be assigned multiple private IP addresses which are then assigned to the pods.
We can login to the AWS Console to see that the Cloudformation stack has been created,

Verify from the EKS Console that the addon has been successfully deployed,

Deploy EKS Node Groups
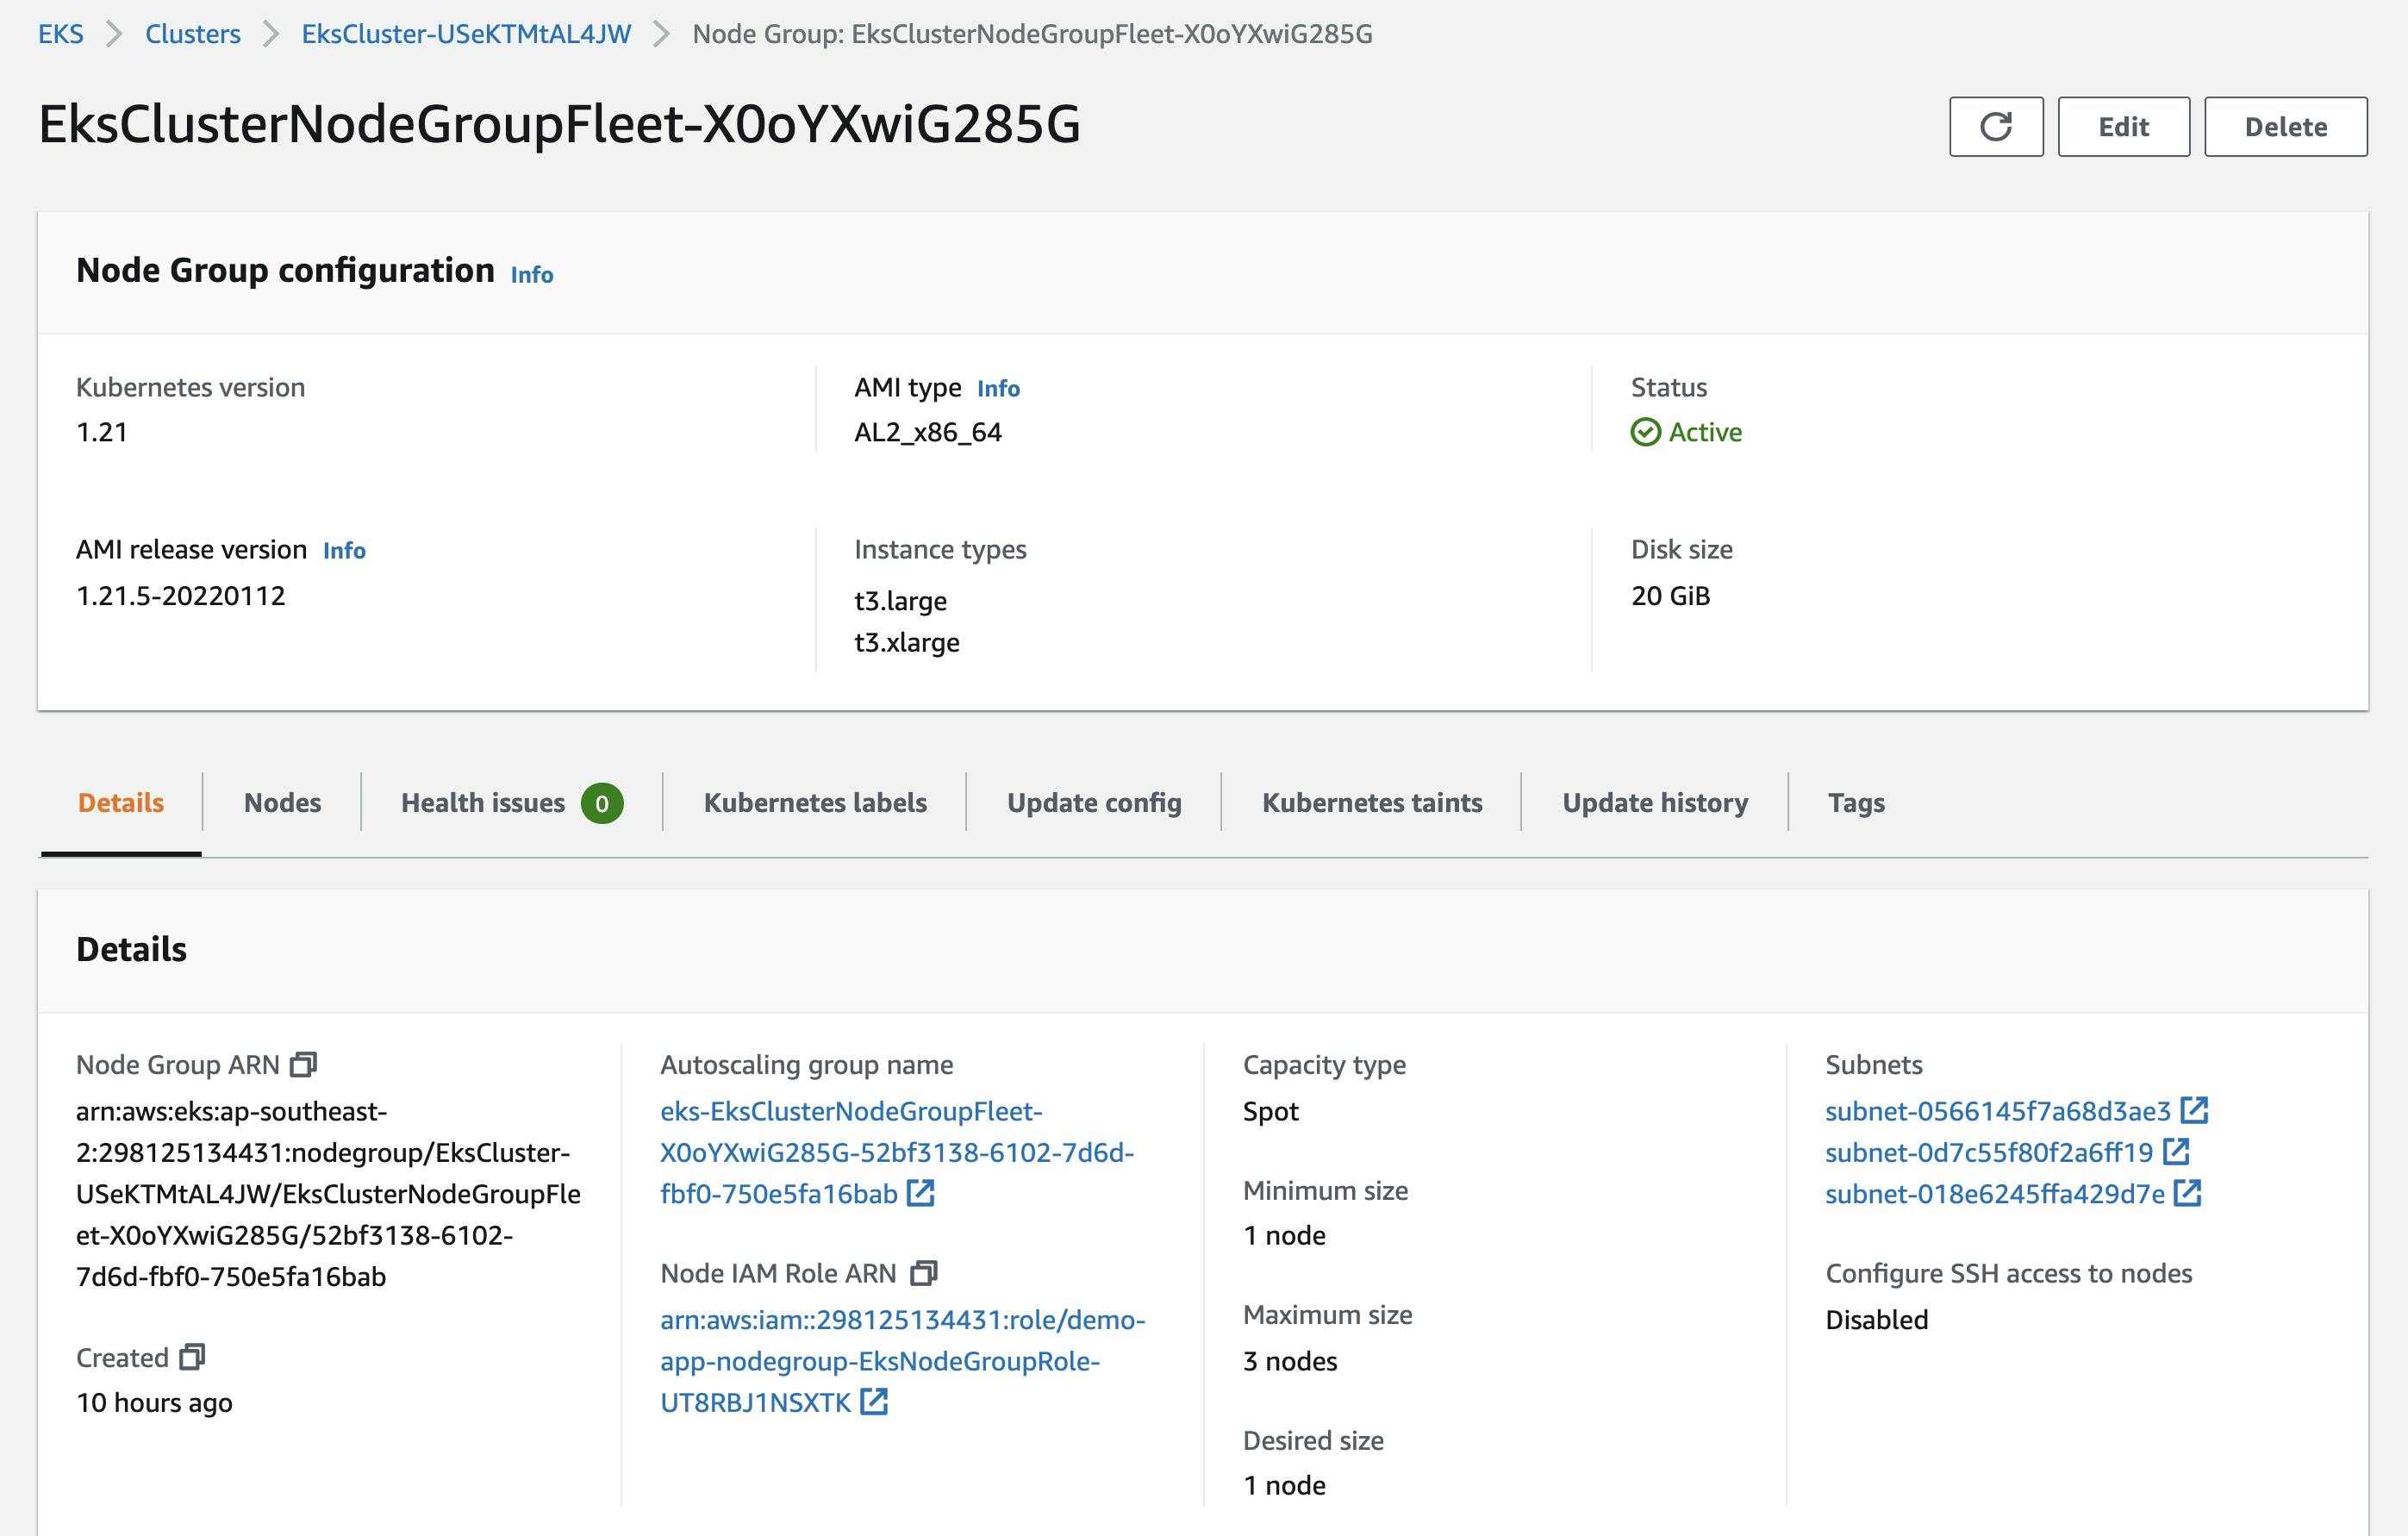
Run make deploy-node-groups to deploy EKS Node Groups.
By default, the node groups are deployed with the following configuration:
- Minimum number of nodes:
1 - Desired number of nodes:
1 - Maximum number of nodes:
3 - Instance types:
t3.large, t3.xlarge
The worker nodes are deployed in private subnets. In order to access the worker nodes, you will need to use AWS Session Manager to create a new session on the worker nodes. Look at docs.aws.amazon.com/systems-manager/latest/.. for more information.
The IAM Role is for NodeGroup to perform certain actions like joining the cluster, communicating with the cluster and reading from container registry to deploy containers into pods. Find out more on Node IAM permissions here.
I am also making use of SPOT instances as this is my test environment, you surely don't want to use SPOT when running production workloads. Learn more about spot instances here .
We can login to the AWS Console to see that the Cloudformation stack has been created,

Verify from EKS Console that the Node Group has been created,
Run kubectl get nodes -o wide to get a list of nodes,

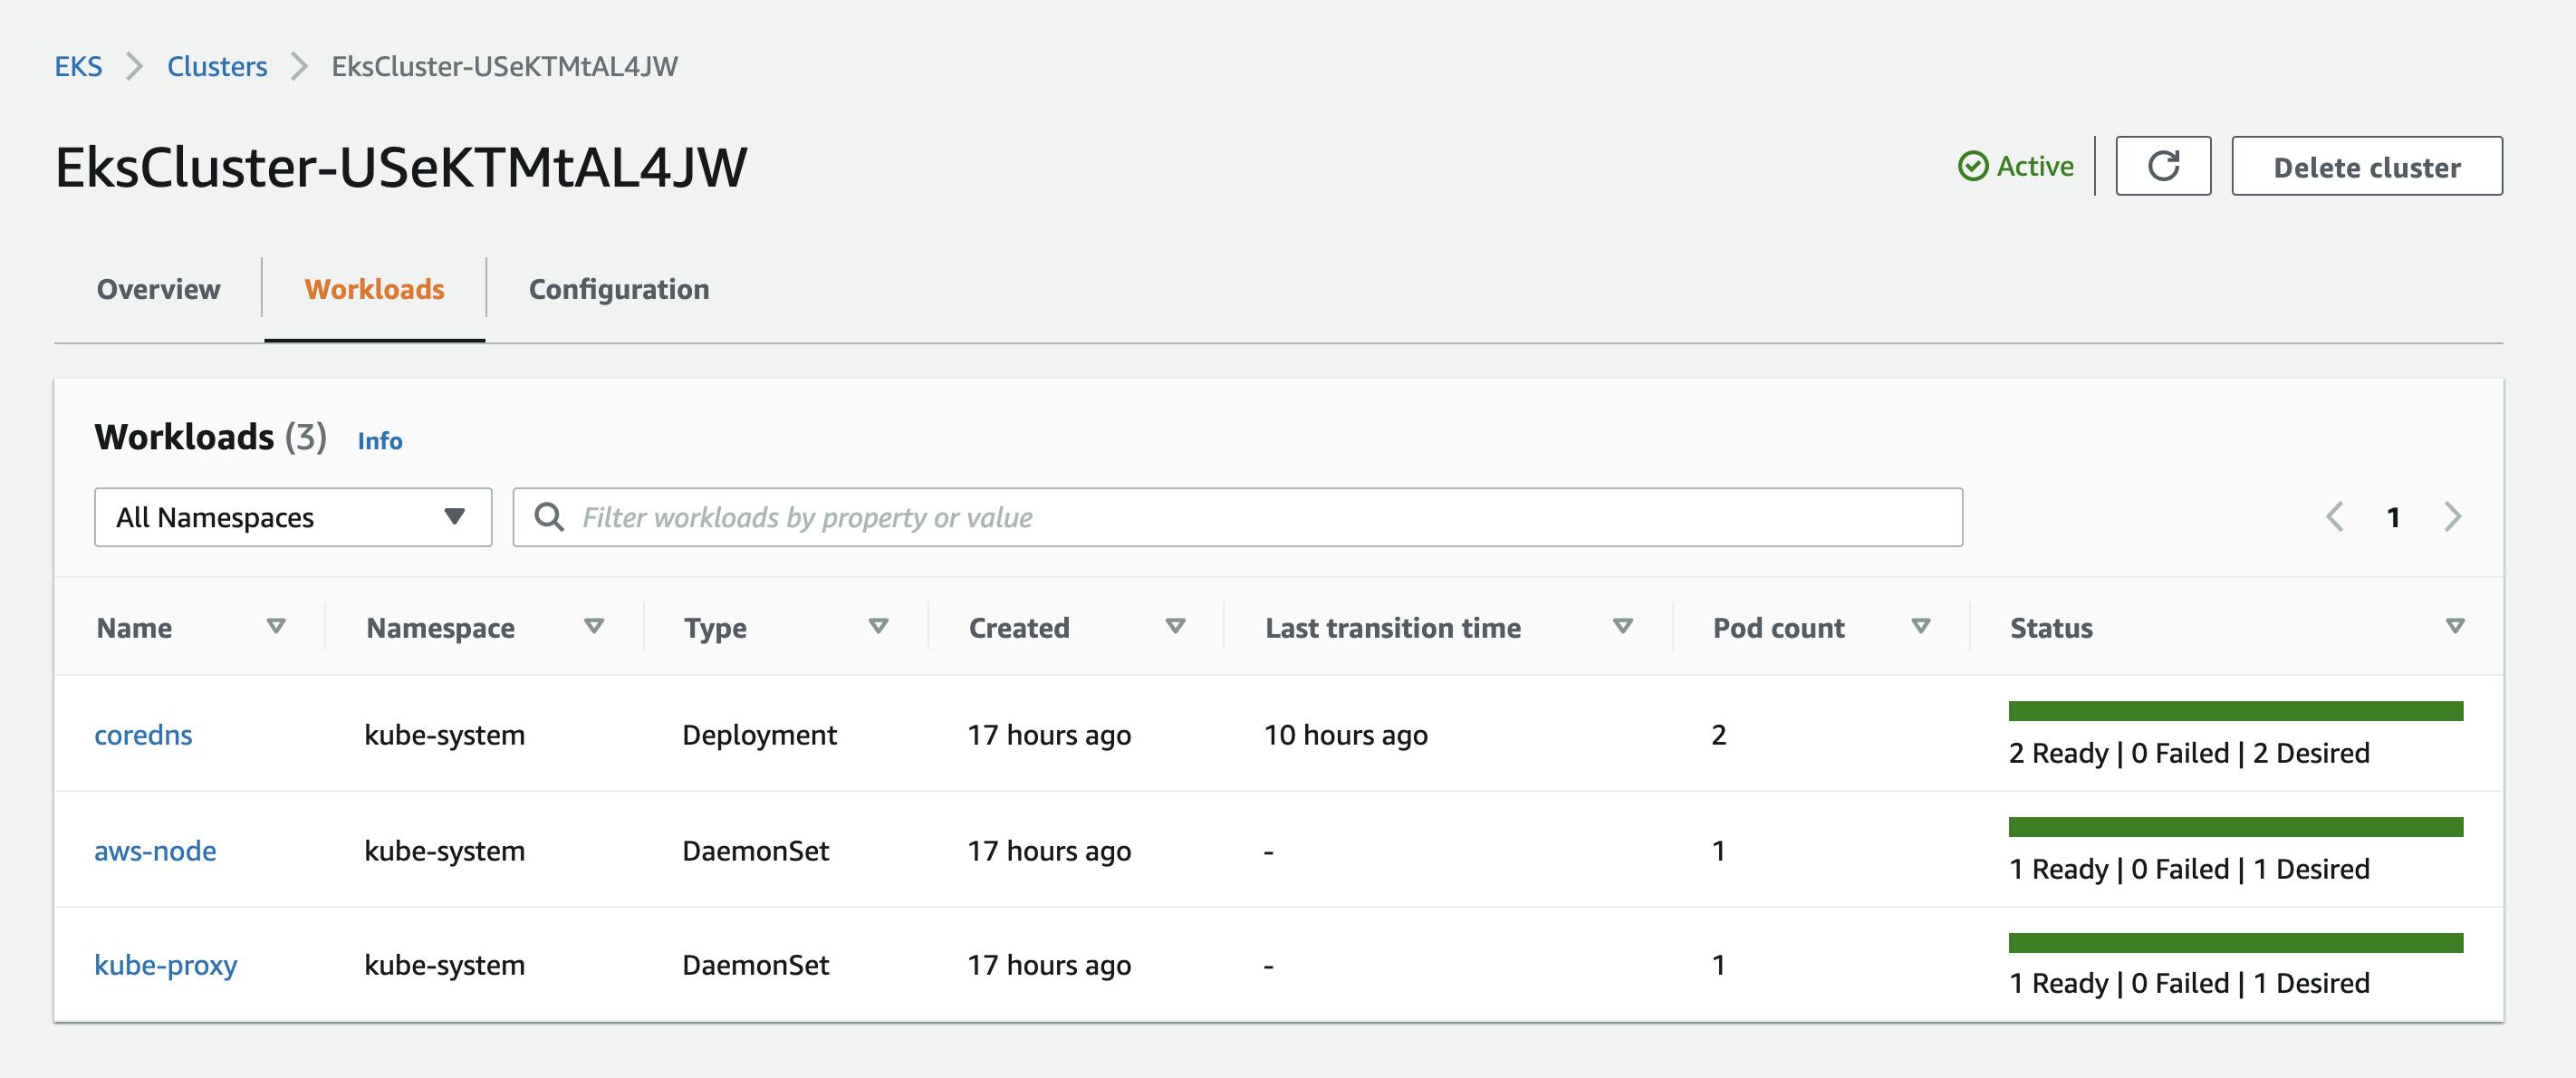
From the workloads section in EKS Console, you can see the various workloads deployed in the cluster. Currently, there are only system components deployed as expected,
Congratulations, we have successfully deployed a managed EKS Environment on AWS. We first deployed supporting resources for the cluster - VPC, then the cluster itself, eks addon (VPC CNI) to support pod networking and finally managed node group as our worker nodes. We are now ready to run applications on the managed EKS environment 🎉

